
Creating Leads in Dynamics 365 Using Microsoft Flow
Tutorial: Creating Leads using Microsoft Flow
Microsoft Flow is a tool that can create automated processes across many applications such as Twitter, SharePoint, Outlook and Dynamics 365. It can help automate processes in ways not possible before in previous versions of CRM. All of this can be done without the use of a developer, which saves time and money. This article will focus on the steps to configure MS Flow to automate Lead creation in CRM from an external website. Previously, if you wanted a visitor filling out contact information on your website to automatically be created as a Lead in Dynamics, you would have to spend a lot of time on custom development. With Microsoft Flow, the process is much simpler and streamlined.
Navigate to Microsoft Flow
Go to https://portal.office.com and login with your organization credentials. Once in, click on the “Flow” tile.
Create a New Flow
In the Flow website, click on “My flows”. Then, click on “Create from blank”:

Choose a Trigger Action
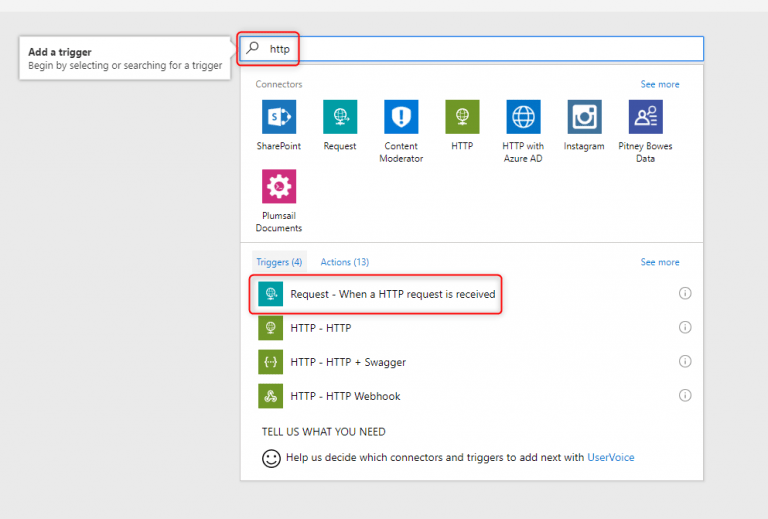
Click in the search box that says “Search hundreds of connectors and triggers”. This will take you to a new page. Then type “http” in the search box. Click on “Request – When a HTTP request is received” trigger that comes up in the results:
Insert JSON Schema
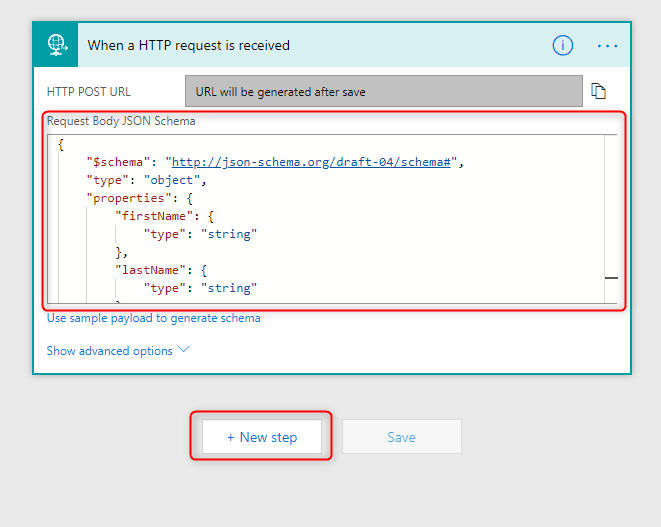
You have now selected an HTTP trigger. This trigger will fire from the webpage you connect to Flow. You must insert a JSON schema into the trigger. The schema should contain the names of the fields on your webpage that you want to be pushed into Dynamics. Here is an example of what a JSON schema looks like:
Once this has been inserted into the Request Body, click the New Step button:
Add Create Lead Action
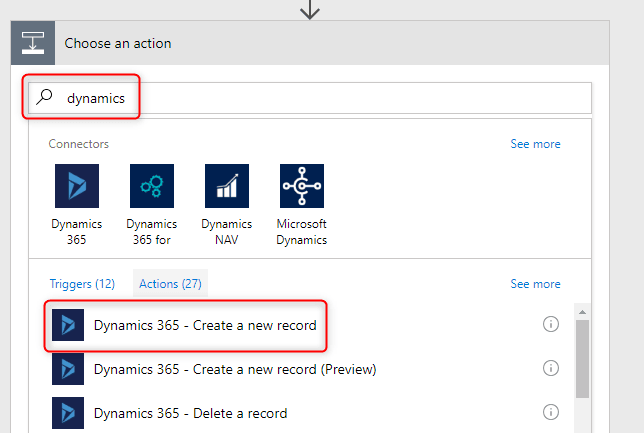
After you click the New Step button, you have the option to Add an action or Add a condition. Choose Add an action. In the search box that appears, type “dynamics”. Click “Dynamics 365 – Create a new record” in the results that appear:
e:
Once this has been inserted into the Request Body, click the New Step button:
Configure Record Creation
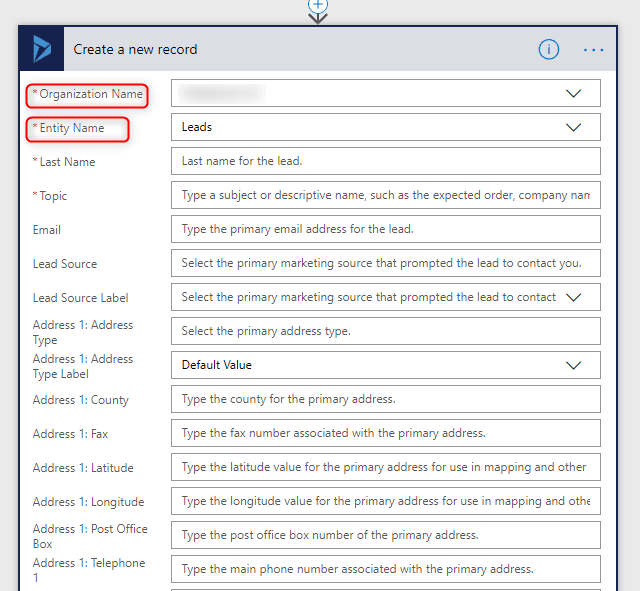
In the Create a new record action that appears, choose the proper Organization Name from the drop-down. Then choose the correct entity type of the record you wish to create. In this example, we will be creating a Lead record. Once these options are selected, the box will expand to show you all available fields to set for creation:
Fill in Required Fields
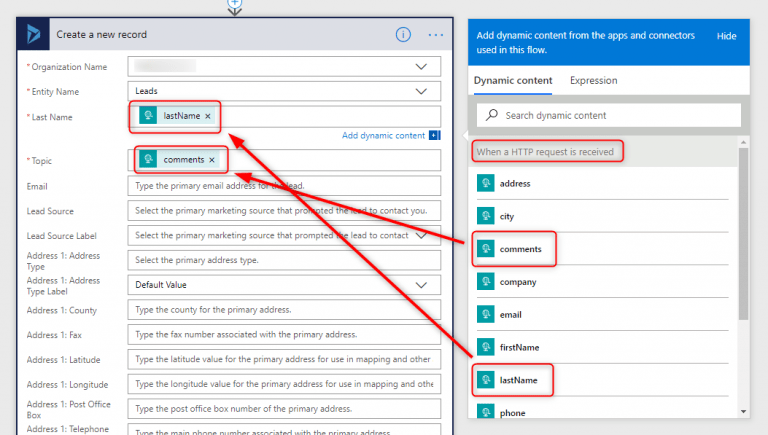
Fill in the required fields for the Lead. The field information brought over from the HTTP request should be available as Dynamic Content to insert into the fields. Any field identified in your JSON schema should be available as dynamic content:
Save Flow and Generate HTTP POST URL
Once you have filled in all the fields desired in the Lead creation step, save the Flow using the save button in the upper right-hand corner of the screen.
Copy HTTP POST URL
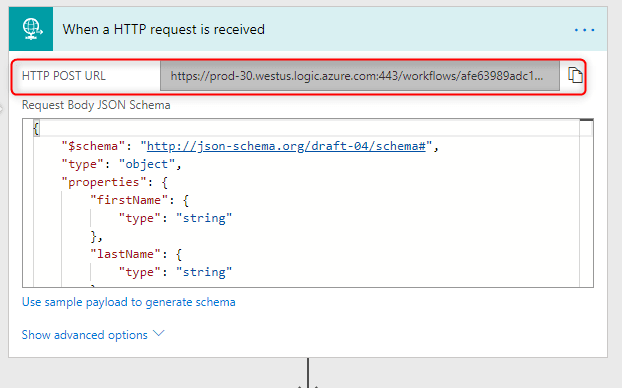
Take note that once the Flow is saved, the HTTP POST URL has been automatically generated. This is extremely important as this URL connects your website to Flow:
Add POST URL to Your Website
On your website, put the auto-generated URL into a new XMLHttpRequest. An example of the function, plus a very simple and testable web form is below. This will show you how this can be done and where the URL could be put in:
Run Code in Chrome to Test
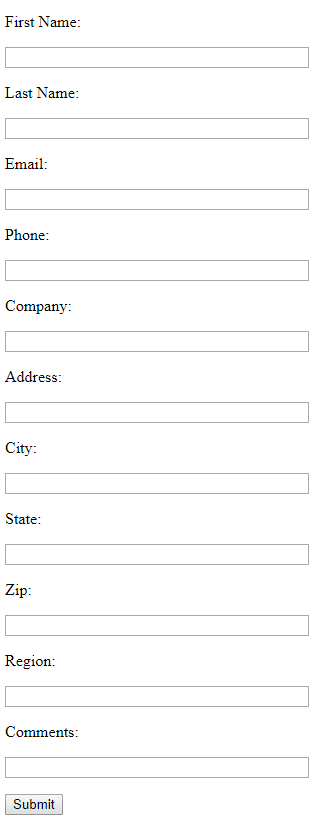
If you have Notepad++, you can save and run the code from above in a browser. Be sure that you have pasted in your unique POST URL and then saved the code from above. The webpage that opens should look like this:
Fill in Fields and Click Submit Button
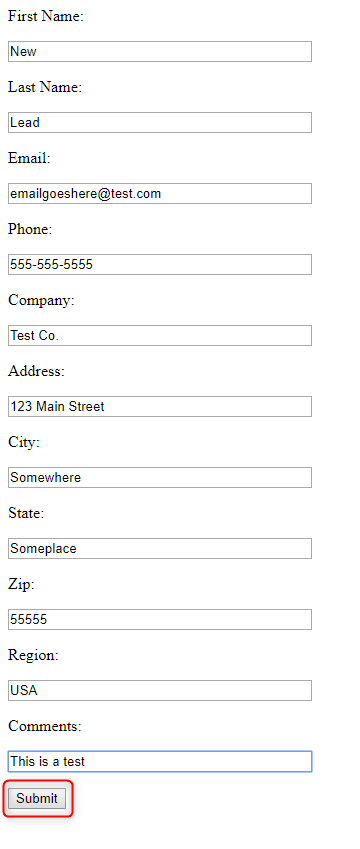
Fill in the fields and click the Submit button. Then, navigate back to Flow to see if the job ran:
Verify if Test Was Successful
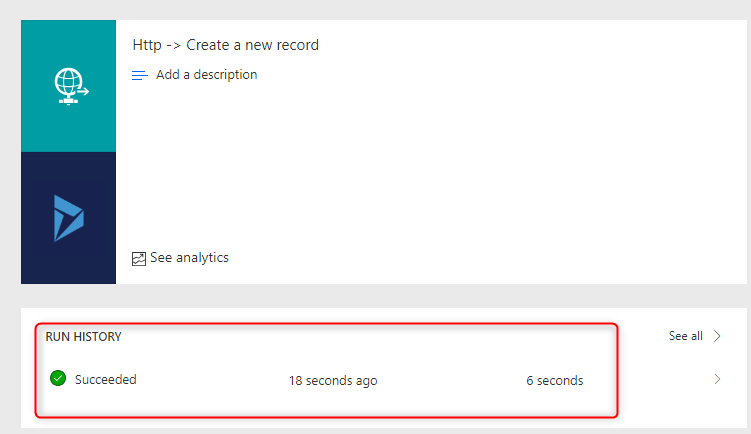
Go back to Microsoft Flow and verify that the test ran successfully. If you go back to “My Flows”, you should see a Run History:
Navigate to Dynamics and Verify that Lead Was Created
Now if we navigate to our Dynamics 365 environment, we can see that the Lead was created successfully. All the fields that we wanted to be populated will have been filled in as we desired.
Conclusion
Integrating webforms with Dynamics is significantly simplified with Microsoft Flow. The utility of Flow doesn’t stop here, either. You can set up email alerts when a new Lead is created. Or you can assign these new Leads to a user other than yourself. In the past, this process took custom development and was costly. But now, all you need is a little knowledge of JavaScript and you can easily set up webform CRM integration in a simple and cost-effective way.

Learn more about Microsoft D365
 Learn More

